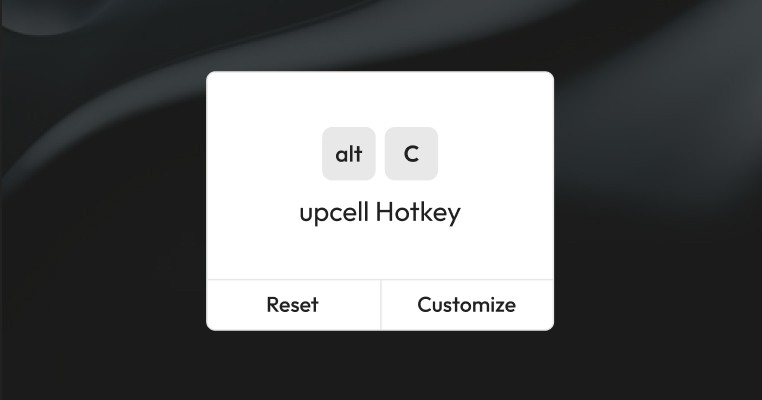
Click on the upcell badge to open up the settings panel.
Confirm that a CRM integration is enabled, i.e. Salesforce or Hubspot. Then click on "Engagement".
Confirm an engagement provider is enabled, i.e. Outreach or Salesloft. Then click on "Hotkeys".
Select "Customize" to modify your hotkey.
Select "Add action" to add a hotkey action.
There are four available actions to pick from.
Select "Add Context" to include context about prospects on every export.
Let's make sure we assign your export to a user as well. Select "Add action" to add a new action.
Choose "Assign to User".
The user will default to yourself, but you can change the default for this hotkey via the dropdown.
Now let's ensure prospects are added to a sequence. Select "Add action" to add a new action.
Select "Add to Sequence".
Click the dropdown to select a sequence you'd like to export the record to.
Finally let's add tags to our exports.
Type in what you want to tag your record with and hit Enter to add it. Tip: Tags can be multiple words with spaces. Just hit enter once you have a complete tag.
Now that we have our hotkey with the appropriate actions, select "Save" and click on the upcell badge to close the settings panel.
Find the right prospect you'd like to export and hit "Alt+C" for Windows or "Option+C" for Mac to export this prospect.
When you hit the hotkey to export, a pop-up will appear with options for the various actions you added. These options will have defaults based on your selections, but you can change them per export.
I'll add new context here and keep the defaults for the other actions. Once you are done, select "Submit". Tip: The popup will open highlighting the first unfilled field, you can tab between fields and hit enter on the submit button without ever touching your mouse.
If there are no errors, you will get a "Export successful" notification.
Author

Mark Bedard
Chief Executive Officer

Subscribe to our newsletter.
Subscribe to our newsletter.
